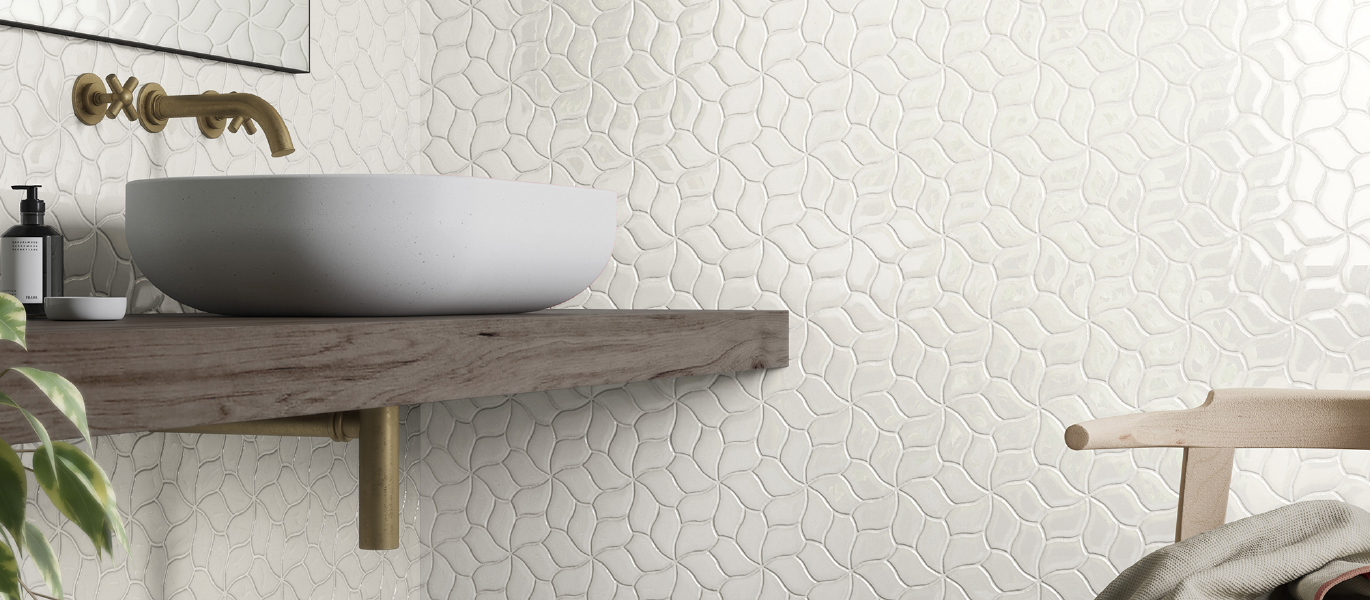
RECEIVE A COMPLIMENTARY QUOTE

Advanced Search

Search All Tile Collections

Search Quick Ship

About us pic

Care and Maintenance

  • Porcelain Tile: Cleaning, Maintenance, Protection and Sealing

    Most types of tiles that are made from clay or a mixture of clay and other materials and then kiln-fired, are considered to be a part of the larger classification called "Ceramic Tiles". These tiles can be split into two groups, porcelain tiles and non-porcelain tiles. These non-porcelain tiles are frequently referred to as ceramic tiles by themselves, separate from porcelain tiles - confusing!

    Non-porcelain ceramic tiles are generally made from red or white clay fired in a kiln. They are almost always finished with a durable glaze, which carries the color and pattern. These tiles are used in both wall and floor applications. Non-porcelain ceramic tiles are usually suitable for very light to moderate traffic and generally have a relatively high water absorption rating making them less frost resistant and they are more prone to wear and chipping than porcelain tiles. Porcelain tile is more scratch resistant than ceramic tile. Also, porcelain tile is fired at higher temperatures than ceramic, resulting in superior durability and stain resistance.

    Porcelain unglazed tile is generally made by the dust pressed method from porcelain clays which result in a tile that is dense, impervious, fine grained and smooth, with a sharply formed face. Porcelain tiles usually have a much lower water absorption rate (less than 0.5%) than non-porcelain ceramic tiles making them frost resistant. Full body porcelain tiles carry the color and pattern through the entire thickness of the tile making them virtually impervious to wear and are suitable for any application from residential to the highest traffic commercial or industrial applications. Because porcelain tile is fire-hardened and quite hard, it can be cleaned at pressures up to 1,450 PSI if the grout is in good condition.

    Porcelain unglazed tiles are similar to glazed tile, except that their surface is not coated. Full-body porcelain unglazed tiles do not show wear because their color extends throughout the tile, making them ideal for commercial applications.

    PEI classes range from 0 to 5. The Porcelain Enamel Institute rating scale is not a measurement of quality. It is a scale that clearly indicates the areas of use each manufacturer recommends and has designed their tile to fit. A PEI 2 tile has been designed for areas where very low traffic and soiling is anticipated. In most cases the aesthetic detailing of these tiles is of prime consideration. You will often find high gloss levels, vibrant colorations and metallic elements in this group of tile. Conversely, a PEI 5 tile has been designed for abusive extra heavy foot traffic:

    • PEI Class 0 - No Foot Traffic: Wall tile only and should not be used on floors
    • PEI Class 1 - Very light traffic: Very low foot traffic, bare or stocking feet only. (Master bath, spa bathroom).
    • PEI Class 2 - Light Traffic: Slipper or soft-soled shoes. Second level main bathroom areas, bedrooms.
    • PEI Class 3 - Light to Moderate Traffic: Any residential area with the possible exception of some entries and kitchens if extremely heavy or abrasive traffic is anticipated.
    • PEI Class 4 - Moderate to Heavy Traffic: High foot traffic, areas where abrasive or outside dirt could be tracked. Residential entry, kitchen, balcony, and countertop.
    • PEI Class 5 - Heavy Traffic: Ceramic tile suggested for residential, commercial and institutional floor subjected to heavy traffic.

  • Sealing Ceramic and Porcelain Tile & Grout

    Glazed tiles are coated with a liquid glass, which is then baked into the surface of the clay. The glaze provides an unlimited array of colors and designs as well as protects the tile from staining. A glazed tile is already stain proof, so there is no purpose to putting on a sealer. However, the grout joint between the tiles is usually very porous and generally made of a cement-based material. Therefore, grout joints typically will need to be sealed and maintained properly to prevent stains and discoloration. Impregnating sealers such as All-Purpose Grout Sealer go into the grout joint and protect against water and oil-based stains. Most industry professionals recognize that grout is best protected with a fluorochemical-based sealer, such as Impregnator Pro orAll-Purpose Grout Sealer. If the grout joint is epoxy, a sealer is not necessary.
     
    Unglazed porcelain tile should be protected with a penetrating sealer, such as Sta-Clene, Bullet Proof or Impregnator Pro, including the grout lines. The penetrating sealer is an invisible, stain resistant shield that is absorbed into the surface.
     
    Cementitious grout must be sealed to prevent or minimize staining. Leaving these surfaces unsealed may greatly hinder the ability to completely remove stains in the future. Allow new installations to cure for 72 hours prior to applying sealer.
     
    For a natural-looking protector on interior surfaces (heavy duty protection, water and oil repellency):
    1. Sweep or vacuum all dust, dirt and debris.
    2. Mask off and protect any baseboards or adjacent areas to avoid splashing and overspray onto surfaces not intended to be treated.
    3. Ensure that the surface is clean, dry and residue-free.
    4. Liberally apply StoneTech Professional™ Grout Sealer to the grout using a low-pressure chemical-resistant sprayer, narrow roller or natural hairbrush, focusing on the grout joints.
    5. Allow sealer to completely penetrate into the grout, 5-15 minutes.
    6. Liberally apply a second coat of Grout Sealer following steps 4-5.
    7. Wipe up all sealer from the surface of the tile. Use a clean, dry, lint-free, cotton towel or mop to remove excess sealer. Or, go over the floor with a cotton bonnet on a low-speed buffer.
    8. If sealer was not completely wiped off and a residue appears, wipe entire surface with a towel dampened with sealer. Use a white, non-abrasive nylon brush or pad to loosen residue and follow with a clean, white absorbent towel to remove.
    9. A full cure is achieved after 24-48 hours; foot traffic may begin in 4 hours. Cover with red rosin paper, if foot traffic must resume before the recommended time periods have passed.
    10. Expected coverage is 600-1,000 sq. ft. per gallon based upon grout joint width.
    11. A 3-5 year re-application is needed for interior surfaces.


  • Cleaning Ceramic and Porcelain Tile & Grout

    Keeping ceramic, porcelain tile & grout free of dust and dry, sandy soil will minimize scratches, wear patterns and grout soiling that can develop from everyday use and traffic.
    Use walk-off mats to trap abrasive soil before it gets into the house or building.
    Sweep, dust or vacuum surfaces regularly to remove loose soil and dust.
    Clean the tile & grout using warm water and a clean nonabrasive cloth sponge or mop.
    Use a neutral cleaner such as Stone & Tile Cleaner or Revitalizer that is specially formulated for ceramic, porcelain tile & grout to help remove soils that sweeping, dusting, vacuuming or damp mopping leave behind.
    For extremely soiled tile, clean with KlenzAll heavy duty alkaline cleaner and degreaser.
    Do not use ordinary household cleaners, as you may degrade the sealer that was applied to the grout to protect against stains.

  • Countertops and Vanities

    Use a ph-balanced cleaner such as Stone & Tile Cleaner or Revitalizer to keep surfaces clean from everyday soils and stains.

  • Floor Surfaces

    Vacuum or dust frequently using a clean non-treated dry dust mop. Sand, dirt and grit may scratch your tile or build-up on your grout joint leading to discoloration. Mats or area rugs inside and outside an entrance will help minimize the potential damage from these particles.
     
    Damp mop your tile floor with a diluted solution of neutral cleaner such as Stone & Tile Cleaner or Revitalizer. Try to stay off the floor until it is completely dry, as wet tile floors may be slippery.
     

  • Bath and Other Wet Areas

    For daily maintenance cleaning, use a neutral, ph-balanced cleaner such as Stone & Tile Cleaner or Revitalizer to clean everyday soils and stains. In the bath, or other wet areas, using a squeegee after each use can help minimize this build-up.

  • Restoring Ceramic and Porcelain Tile & Grout

    For cleaning and restoring old ceramic, porcelain tile and grout to like new condition, we recommend using an acidic cleaner such as Restore designed for this surface. This will remove tough soap scum, hard water deposits, grout haze and efflorescence. If you have heavy grease and oil stains, pre-clean using an alkaline cleaner formulated for ceramic and porcelain tile, such as KlenzAll heavy duty alkaline cleaner and degreaser. This will cut through tough grease and soil stains.
     
    After restoring your tile and grout, remember to seal with an impregnating sealer such as Bullet Proof or Impregnator Pro, including the grout lines.to guard against future stains.

  • Grout Etching

    Ceramic and porcelain tile is usually impervious or highly resistant to staining. However, grout may be a different story. Substances that are highly acidic, such as orange juice, coffee, vinegar, wine, tomato-based products, mustard and many soft drinks will most likely leave an “etch,” a chemical reaction that may leave a dull area or mark. Properly sealing the grout will give you time to wipe up a spill to avoid staining, but it cannot prevent etching. In addition, ordinary household cleaners with colored dyes or those containing bleach, ammonia or abrasives are not recommended for ceramic, porcelain tile & grout. They may damage the surface and likely degrade the sealer that is applied to the grout, which provides stain protection.

  • Food Spills

    Scoop up food with a plastic spoon. Blot with a dry white cloth. Spray the area with a neutral cleaner such as Stone & Tile Cleaner or Revitalizer and wipe off excess with a clean cloth.

  • Liquid Spills

    Blot up the excess with a clean, dry cloth. Then clean the area with Stone & Tile Cleaner or Revitalizer and wipe off excess with a clean cloth.

  • Mud

    Let the mud stain dry completely. Remove dried mud with a soft plastic nylon brush. Then clean the area with Stone & Tile Cleaner or Revitalizer and wipe off excess with a clean cloth.

  • Restorative Cleaning of Ceramic and Porcelain Tile & Grout

    Depending on the type of soil, stain or other foreign matter present, select one or more of the following options:
     
    • For stripping off any existing topical acrylic, urethane, epoxy, heavy wax coatings and epoxy grout haze:
      • Mask off and protect any baseboards or adjacent areas to avoid splashing and overspray onto surfaces not intended to be treated.
      • Sweep or dust mop loose dirt and debris.
      • For heavy, hard to remove coatings, use StoneTech Professional™ Heavy Duty Coating Stripper as is.
      • For softer coatings, dilute Heavy Duty Coating Stripper with clean water up to a 1 to 1 solution.
      • Apply an even coat using a chemical-resistant paintbrush, roller or deck brush.
      • Allow stripper to dwell for 20 minutes to 2 hours or as long as needed to soften coating.
      • Heavy Duty Coating Stripper will remain active for up to 24 hours
      • Do not allow Heavy Duty Coating Stripper to remain in contact with epoxy grout joints for longer than two hours.
      • Agitate well using a stiff nylon bristle scrub brush, stiff bristle push broom or a weighted floor machine at 130-140 lbs., 175 rpm, fitted with a scrub brush attachment.
      • Rinse well with clean water and mop, sponge or wet vacuum to remove the remaining cleaning solution.
      • A hard surface extraction wand and portable or truck mounted extraction machine may be used.
      • Repeat the rinsing and wet vacuum process to insure that all dirt, soil and cleaner residues have been removed.
    • For cleaning of grease, oil, dirt, dry soil and soap scum:
      • Mask off and protect any baseboards or adjacent areas to avoid splashing and overspray onto surfaces not intended to be treated.
      • Sweep or dust mop loose dirt and debris.
      • Strip off all topical finishes such as waxes and coatings.
      • Prepare a solution of StoneTech Professional™KlenzAll™ mixed with warm or hot water as suggested below:
        • (a) Medium Duty Usage — Mix 1 part KlenzAll™ to 4 parts of water.
        • (b) Heavy Duty Usage — Mix 1 part KlenzAll™ to 2 parts of water.
      • Apply KlenzAll™ using a low-pressure chemical-resistant sprayer, sponge or mop.
      • Agitate well using a stiff nylon bristle scrub brush, stiff bristle push broom or a weighted floor machine at 130 lbs.-140 lbs., 175 rpm, fitted with a scrub brush attachment.
      • Rinse well with clean water and mop, sponge or wet vacuum to remove the remaining cleaning solution.
      • A hard surface extraction wand and portable or truck mounted extraction machine may be used.
      • Repeat the rinsing and wet vacuum process to insure that all dirt, soil and cleaner residue have been removed.
      • To remove deep or stubborn oil stains not completely removed by KlenzAll™, let the surface dry and use StoneTech Professional™ Oil Stain Remover.
        • Apply a ¼ inch thick coat of Oil Stain Remover to the oil stained area.
        • Ensure that Oil Stain Remover covers an area 1” to 2” beyond the stained area for the purpose of containment.
        • Allow 2-3 days for the Oil Stain Remover to dry to a powder.
        • Sweep and wipe up dried powder and evaluate the stained area for removal.
        • Repeat process if needed.
        • Remove any remaining Oil Stain Remover using mineral spirits.

  • Problems most frequently encountered with the use of top-coating sealers on porcelain are:

    • Wear patterns are easily developed over time.
    • If the sealer has been applied to a floor which has not been properly cleaned, it will cause the floor to look hazy.
    • If the sealer is improperly applied, it can turn to a milky-white color.
    • Multiple coats of the top sealer can cause discoloration of the tile surface.
    • When problems such as these occur, the sealer must be stripped from the tile and a new coat of sealer re- applied. This is a costly and unnecessarily repetitive procedure.
     

  • Products for Ceramic and Porcelain Tile & Grout Maintenance and Protection:

    • All-Purpose Grout Sealer
    • Bullet Proof impregnating water-based sealer
    • Impregnator Pro impregnating solvent-based sealer
    • KlenzAll heavy duty alkaline cleaner and degreaser
    • Oil and Stain Remover
    • Revitalizer™ cleaner & protector
    • Stone Care Guide tri-fold Brochure
    • Stone Care Guide
    • Stone Sealer impregnating water-based sealer